Making Prototypes with Tools You Already Have

They say that necessity is the mother of invention. For me, the necessity resulted from long product development cycles paired with short windows for user testing and little room for iteration. The “invention” was the discovery of a powerful set of tools for prototyping that are available on just about every office computer. I found that you can use “Developer Tools” in Microsoft Office’s Excel, Powerpoint and Word to not only draw the basic outlines of a wireframe but also build a functioning prototype that simulates many of the features you want in your final product.
Developer Tools allow you to add working data entry fields to your design, including open-ended text boxes, radio buttons, check boxes, and drop-down lists. You can also simulate the proposed functions of your prototype by programming command or toggle buttons. For example, you can add a Cancel button that removes the data entered on a page and returns you to the previous page. (Here’s a more thorough explanation) (PDF, 194 KB, 2 pages).
Although some of this functionality is as simple as dragging and dropping these fields (referred to in Microsoft Office as “Controls”) into your document, a little bit of Visual Basic for Applications (VBA) programming can take things to the next level. Programming may seem intimidating, but I can assure you that VBA programming is not difficult to pick up. I learned all that I needed to know by searching the Internet for the functions I wanted to add and through trial-and-error.
With VBA, you can test interactions before you do any actual system development. For example, you can see how participants react to error messages or being routed through different paths in the site depending on what they click or type. You can test some of these interactions with paper, but you get a more realistic, interactive experience using these tools.
A Practical Example
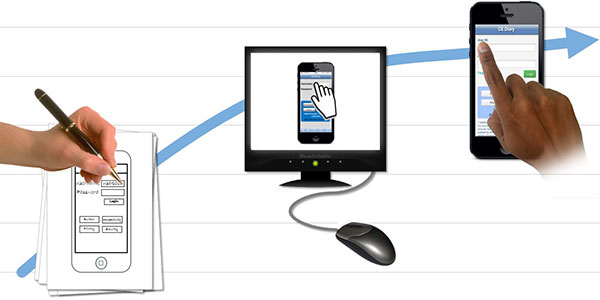
I recently conducted a usability test for a mobile-optimized website that Bureau of Labor Statistics (BLS) survey participants can use to record their purchases. However, a test version of the website wasn’t ready for testing. So I used PowerPoint presentation and Excel Developer Tools to make a prototype of the site that allowed me to conduct tests that would have been less realistic and more difficult to evaluate with a paper prototype. Participants could log in to the site, navigate through the various pages, enter data, and edit previous entries, just as they would with the real site. The one major difference was that they used the computer’s physical keyboard, mouse, and display rather than a virtual keyboard and tapping on the screen of a mobile device.
This testing provided valuable information that we used to update the website requirements and make usability fixes. In addition, I used the prototype to give project stakeholders and developers something concrete to react to. As changes were recommended, I incorporated them into the prototype, and stakeholders could react to not only the visual design but also the functionality. I think this design process improved communications among stakeholders and led to a much better final product.
I have since used Office Developer Tools and VBA programming to build more prototypes. I have also used these tools to develop Access databases, perform simple data coding in Excel, and design fillable forms in Word. With each project, the time needed to build the prototypes gets shorter and the range of functions gets larger. It’s a learning process and one that I think is well worth the effort.
Finally, if you’d like to see the Prototypes themselves, you can download the Powerpoint File (PowerPoint presentation, 141 KB, 1 slide, Dec. 2014).
Brandon Kopp is Research Psychologist at the Bureau of Labor Statistics (BLS). Editor’s Note: You can check out our previous articles on the importance of Prototyping, including how to make a mobile paper prototype and how to do design sketches.


